Transporting bikes doesn’t have to be complicated or time-consuming. With the right approach, you can install a hitch-mounted carrier on your SUV quickly and confidently. This method of bike transportation has become increasingly popular among outdoor enthusiasts because it’s secure, convenient, and doesn’t require special skills or tools.
Many people avoid installing carriers themselves because they assume the process is difficult or requires mechanical expertise. However, modern designs have simplified the process significantly. Most systems can be set up in just a few minutes, even if you’ve never done it before.
This comprehensive guide walks you through everything you need to know about mounting a carrier on your vehicle. You’ll learn about preparation, step-by-step installation, safety checks, and troubleshooting common issues. By the end, you’ll have the confidence to handle the entire process independently.
Understanding Your Receiver Hitch
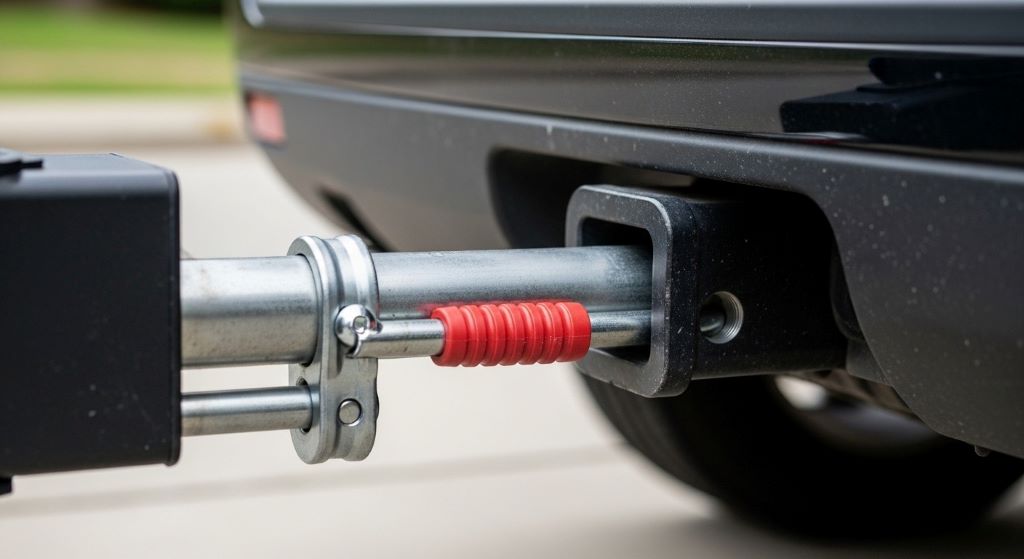
Before you can install any carrier, you need to understand the receiver hitch on your SUV. This component is the foundation for your entire setup. The receiver is a square tube mounted to your vehicle’s frame, and it’s designed to accept various accessories.
Hitches come in different classes, rated by their weight capacity. Class 1 hitches support up to 2,000 pounds of trailer weight, while Class 2 handles up to 3,500 pounds. Class 3 and higher can support even more. For bike carrying purposes, most SUVs have Class 2 or Class 3 hitches, which are more than adequate.
The receiver opening size is equally important. Most hitches have either a 1.25-inch or 2-inch square opening. You must match your carrier to your hitch size. Some carriers come with adapters that allow a 2-inch rack to fit a 1.25-inch receiver, but never try forcing incompatible sizes together.
Check your vehicle’s owner’s manual or look for a label on the hitch itself that indicates the class and size. This information determines which carriers are compatible with your SUV. Additionally, verify the tongue weight rating, which is the maximum weight you can place on the hitch when not towing.
Choosing the Right Carrier for Your Needs
Not all carriers are created equal, and selecting the appropriate style affects both installation ease and performance. Understanding the different types helps you make an informed decision.
Platform-style carriers hold bikes by their wheels, eliminating contact with the frame. These designs accommodate various frame shapes, including those with unusual geometries or carbon fiber construction. They’re generally heavier but offer superior stability and easier loading.
Hanging-style carriers support bikes by the top tube, suspending them from an arm. These are typically lighter and more affordable. However, they require compatible frame designs and may allow bikes to sway slightly during transport.
Tilt-away carriers let you access your SUV’s rear hatch without removing bikes. This feature is invaluable if you need to grab items from your cargo area during trips. The tilting mechanism adds slight complexity but greatly enhances convenience.
Folding carriers can be collapsed when not in use, reducing the projection from your vehicle. This feature makes parking easier and reduces wind resistance when you’re not carrying bikes. Consider this option if you frequently drive without bikes loaded.
Capacity varies from single-bike to five-bike carriers. Choose based on your typical usage, but remember that higher capacity means more weight and a longer reach from your vehicle. Most families find two to four bike capacity ideal.
Gathering Your Tools and Materials
One advantage of modern carrier systems is that they require minimal tools for installation. Having everything ready before you start makes the process smooth and efficient.
Most carriers include all necessary hardware in the package. This typically includes the main rack assembly, locking pins or bolts, anti-wobble devices, and safety straps. Check the contents against the packing list to ensure nothing is missing.
You’ll need just a few basic tools. An adjustable wrench or set of combination wrenches covers most bolt sizes. Some systems use hand-tightened knobs exclusively, requiring no tools at all. A flashlight helps you see into the receiver opening, especially in dim garages or parking areas.
Keep the instruction manual handy throughout the process. While this guide provides general information, your specific model may have unique requirements or features. Manufacturers design instructions to complement their products precisely.
A helper isn’t necessary but can be useful, particularly with heavier platform-style carriers. These can weigh 40 to 60 pounds, making them awkward to maneuver alone. An extra set of hands also helps with alignment during insertion.
Protective gloves prevent scraped knuckles and improve grip. The receiver opening often has sharp edges, and gloves provide a simple layer of protection. Additionally, they keep your hands clean when handling the carrier.
Preparing Your Vehicle
Proper preparation ensures a smooth installation and helps identify potential issues before they become problems. Taking a few minutes for this step saves frustration later.
Clean the receiver opening thoroughly. Road grime, dirt, and rust accumulate inside, making insertion difficult and potentially damaging the carrier’s shank. Use a wire brush to scrub the interior surfaces, then wipe away debris with a rag.
Inspect the receiver for damage or excessive rust. Small amounts of surface rust are normal, but structural damage or severe corrosion compromises safety. If you notice significant issues, have the hitch inspected by a professional before proceeding.
Check for any existing accessories in the receiver. Remove hitch covers, cargo carriers, or other attachments. These must come out completely before you can insert the bike carrier.
Verify that the receiver’s bolt holes are clear and accessible. Some designs have a pin that goes through the receiver and carrier shank, while others use bolts. Ensure you can reach these attachment points easily.
Position your SUV on level ground in a well-lit area. This makes installation easier and safer. Avoid working on slopes where the carrier might shift unexpectedly. Good lighting helps you see alignment marks and small components clearly.
Step-by-Step Installation Process
Now that you’re prepared, the actual installation goes quickly. Following these steps systematically ensures correct setup and safe operation. This bike rack installation guide works for most models, though specific details may vary.
Start by removing any packaging materials from your carrier. Some components come wrapped or zip-tied together for shipping. Remove these restraints completely, but save the packaging until you’ve confirmed everything works correctly.
If your carrier folds or has collapsible features, extend it to the fully open position. This makes it easier to handle and prevents accidentally trying to insert a partially folded carrier. Lock it in the extended position according to the manufacturer’s instructions.
Lift the carrier and align the shank with the receiver opening. The shank is the square tube that slides into your hitch. Match the bolt holes on the shank with those on the receiver. This alignment is crucial for securing the carrier properly.
Slide the shank into the receiver opening. It should glide in smoothly with minimal resistance. If you encounter significant resistance, stop and check for obstructions. Never force the shank, as this can damage both the carrier and receiver.
Once fully inserted, the carrier should sit level or slightly tilted up at the end. Some designs have multiple holes allowing height adjustment. Choose the position that provides the best clearance for your bikes and vehicle.
Insert the hitch pin or bolt through the aligned holes. This fastener keeps the carrier from sliding out of the receiver. Thread it completely through both sides. If using a bolt system, thread the nut onto the opposite side.
Tighten the pin or bolt securely. Use your wrench to achieve snug tightness, but don’t overtighten, which can strip threads or damage components. The carrier should no longer slide within the receiver when properly secured.
Install the anti-wobble device if your system includes one. These mechanisms eliminate play between the carrier and receiver, reducing noise and wear. They typically involve a threaded bolt that presses against the receiver to create friction.
Attach any safety straps or secondary retention systems. These provide backup security in case the primary fasteners loosen. Route them according to the instructions, usually attaching to fixed points under your vehicle.
Fine-Tuning the Setup
After basic installation, making small adjustments optimizes performance and safety. These refinements take just moments but significantly improve your experience.
Test the tilt mechanism if your carrier has this feature. Ensure it operates smoothly and locks securely in both the upright and tilted positions. You should hear or feel a positive click when the lock engages.
Adjust the bike cradles or arms to accommodate your specific bicycles. Most carriers allow spacing modifications to fit different wheel sizes and frame styles. Set these before loading bikes to ensure proper fitment.
Check ground clearance, especially if you have larger bikes or your SUV sits low. You need adequate clearance for driveways, speed bumps, and uneven terrain. Some carriers offer height adjustments to address this concern.
Verify that the carrier doesn’t obstruct your license plate or lights. Many jurisdictions require visible plates and functioning lights while driving. If your carrier blocks these, you may need to add a license plate extension or auxiliary lights.
Additionally, ensure the carrier doesn’t interfere with your rear camera or parking sensors. Some systems extend far enough to trigger proximity alerts or appear in camera views. Understanding these limitations helps you adapt your driving accordingly.
Loading Bikes Safely
Proper loading techniques protect both your bikes and vehicle while ensuring secure transport. Following a consistent process reduces the risk of damage or accidents.
Start with the bike closest to your vehicle, working outward. This sequence makes it easier to position each bike without interference from already-loaded ones. It also distributes weight more evenly across the carrier.
Lift each bike carefully and place the wheels in the designated cradles or channels. Platform carriers have specific positions where wheels rest, while hanging carriers have hooks for the top tube. Align everything before securing.
Secure each bike according to the carrier’s design. Wheel straps on platform carriers should be snug but not overly tight. Frame clamps on hanging carriers must grip firmly without crushing the tube. Check that all securing mechanisms are fully engaged.
Space bikes to prevent contact during transport. Handlebars and pedals often interfere between bikes. Offset handlebars by turning them at different angles, and consider removing front wheels on some platform carriers to save space.
Test each bike by trying to lift or shake it. Properly secured bikes shouldn’t move more than slightly. Excessive movement indicates loose straps or improper positioning. Adjust until all bikes are stable.
Performing Safety Checks
Before driving, thorough safety verification prevents problems on the road. This final inspection takes less than two minutes but provides essential peace of mind.
Physically shake the carrier to test its connection to the receiver. It should feel solid with minimal movement. Any excessive wobbling indicates loose connections that need tightening immediately.
Verify all locking mechanisms are engaged. This includes the primary hitch pin or bolt, anti-wobble devices, and any security locks that prevent theft. Many carriers have visual indicators showing when locks are properly set.
Check each bike individually one more time. Confirm straps are tight, frames are secured, and nothing has shifted during your initial loading. Pay special attention to quick-release wheels, which can loosen if not properly secured.
Walk around your vehicle and view it from different angles. This perspective often reveals issues you might miss when standing directly behind the SUV. Look for bikes tilting, straps hanging loose, or clearance problems.
Test the carrier’s lights if it has an integrated lighting system. Brake lights, turn signals, and license plate illumination must all function correctly. If your carrier blocks existing lights without providing replacements, you may need to add auxiliary lighting.
Understanding Weight Limits and Distribution
Exceeding weight limits or distributing weight improperly can damage your carrier, hitch, or vehicle. Understanding these concepts ensures safe operation.
Every hitch has a tongue weight rating, typically 200 to 500 pounds for bike-carrying applications. This rating includes the carrier’s weight plus all loaded bikes. Weigh your complete setup to ensure you stay within limits.
Individual carriers also have maximum capacity ratings. A four-bike carrier might be rated for 160 pounds total, meaning four 40-pound bikes or two 80-pound e-bikes. Never exceed this limit, even if your hitch can handle more weight.
Distribute weight evenly across the carrier when possible. Placing all heavy bikes on one side creates imbalance that stresses components and affects handling. Alternate lighter and heavier bikes to maintain balance.
Consider your vehicle’s rear suspension when loading heavy bikes. Multiple e-bikes can weigh 200 pounds or more, noticeably affecting how your SUV handles. You may notice reduced rear visibility or changes in braking response.
Driving with Your Loaded Carrier
Once installed and loaded, adjusting your driving habits ensures safety and protects your equipment. These considerations become second nature with practice.
Remember that your vehicle is now longer. The carrier extends beyond your normal bumper, affecting parking and maneuvering. Leave extra space when backing up and take wider turns to avoid clipping obstacles.
Reduce your speed slightly, especially on rough roads. Loaded carriers create additional weight far from your vehicle’s center of gravity, affecting handling. Lower speeds give you more control and reduce stress on the carrier.
Avoid sudden braking or aggressive acceleration. The bikes’ weight creates momentum that can stress connection points. Smooth, gradual inputs keep everything stable and reduce wear on components.
Check your setup after the first few miles of driving. Components can settle or shift during initial use. Pull over safely and verify everything remains tight and secure. This quick check often prevents issues from developing.
Be mindful of height when entering parking structures or drive-throughs. Loaded bikes can add two feet or more to your vehicle’s height. Know your clearance and choose routes accordingly.
Maintaining Your System
Regular maintenance keeps your carrier functioning safely and extends its lifespan. These simple tasks require minimal time but prevent expensive problems.
Clean the carrier after each use, especially after exposure to rain, mud, or salt. Rinse with fresh water and wipe down metal components. This removes corrosive materials that cause rust and deterioration.
Lubricate moving parts periodically. Hinge points, folding mechanisms, and locking components benefit from occasional application of appropriate lubricant. This prevents corrosion and ensures smooth operation.
Inspect straps and securing mechanisms for wear. Fabric straps can fray or weaken over time, particularly with UV exposure. Replace worn components before they fail.
Check fasteners regularly for tightness. Vibration during driving can gradually loosen bolts and connections. A quick inspection before trips catches these issues early.
Store the carrier in a protected area when not in use. Leaving it installed on your vehicle exposes it to weather unnecessarily and creates a theft target. Remove it and store it indoors or in a secure location.
Troubleshooting Common Issues
Even with careful installation, you might encounter occasional problems. Knowing how to address these issues quickly gets you back on the road.
If the carrier wobbles excessively, tighten the anti-wobble device or add a stabilizer. Some play is normal, but excessive movement indicates insufficient securing. Adding a hitch tightener often solves this problem.
When bikes contact each other during transport, adjust spacing or reposition handlebars. Most contact issues stem from improper loading rather than carrier design. Taking time to position bikes carefully eliminates most interference.
Difficulty accessing the rear hatch often means the carrier extends too far. Tilt-away designs solve this, but you can also partially unload bikes to create access. Some people find removing one bike is quicker than tilting the entire carrier.
Squeaking or rattling noises usually indicate metal-on-metal contact without proper securing. Identify the source and tighten the relevant connection. Rubber pads or padding can eliminate noise from unavoidable contact points.
If the shank won’t slide into the receiver smoothly, check for obstructions or rust buildup. Clean both surfaces thoroughly and try again. A small amount of lubricant on the shank can help with tight-fitting receivers.
Conclusion
Installing a carrier on your SUV is a straightforward process that most people can complete in minutes. Understanding your receiver hitch, choosing compatible equipment, and following systematic installation steps ensures success. This hitch rack setup requires minimal tools and no special expertise, making it accessible to anyone who needs to transport bikes.
Proper preparation, careful loading, and thorough safety checks protect your investment and ensure secure transport. Following this bike rack installation guide helps you avoid common mistakes and builds confidence in your ability to handle the process independently. Car hitch racks offer tremendous convenience once you master the basic installation and operation.
Regular maintenance and safe driving practices extend the life of your equipment while protecting your bikes and vehicle. Taking time to understand weight limits, distribution, and proper securing techniques prevents damage and enhances safety. The small effort invested in correct setup pays dividends through years of reliable service.
With practice, you’ll find that installing and loading your carrier becomes a quick, routine task. The freedom to transport bikes easily opens up new adventures and destinations. Whether you’re heading to local trails or cross-country destinations, you’ll have the confidence that your bikes are securely mounted and ready for the journey.
Frequently Asked Questions
Can I install a hitch bike rack without professional help?
Yes, most people can install a carrier themselves without professional assistance. Modern designs use simple pin or bolt systems that require no special skills. The process typically takes 10 to 15 minutes for first-time installations. However, if you don’t have a receiver hitch installed on your vehicle yet, professional installation of the hitch itself is recommended as it involves mounting to your vehicle’s frame.
How do I know what size receiver my SUV has?
Check inside the receiver opening for a label indicating the size, typically 1.25-inch or 2-inch. You can also measure the interior dimensions with a tape measure. The square opening will measure either 1.25 or 2 inches on each side. Your vehicle’s owner’s manual also contains this information. If you still can’t determine the size, any automotive shop can identify it quickly.
Is it safe to drive long distances with bikes on a hitch rack?
Yes, properly installed carriers are designed for highway travel and long-distance trips. Ensure all connections are tight, bikes are securely fastened, and weight limits aren’t exceeded. Check everything after the first 10 miles and periodically during long trips. Reduce speed slightly on rough roads and drive cautiously to minimize stress on the system. Thousands of people successfully transport bikes cross-country using these carriers.
Do I need to remove the carrier when not carrying bikes?
While not strictly necessary, removing the carrier when unused is recommended. Leaving it installed reduces fuel efficiency, affects handling slightly, and exposes the carrier to unnecessary weathering. Additionally, it can obstruct rear visibility and parking sensors. Most carriers detach in seconds, making removal between uses practical. However, if you use it frequently, leaving it on for short periods is acceptable.
Can I still access my rear hatch with the rack installed?
This depends on the carrier design. Standard carriers typically block hatch access when bikes are loaded, requiring you to unload bikes first. Tilt-away carriers solve this problem by swinging away from the vehicle, providing full hatch access even with bikes loaded. Some people find that removing just one or two bikes provides adequate access without completely unloading. Consider your needs when selecting a carrier style.
Related Topics:
The Ultimate Guide to Street BMX Tricks for SoCal Riders
Is A BMX a Road Bike: Discover the Differences and Similarities