Three years ago I bought a $520 hardtail that every forum said was “barely trail-worthy”—today that same bike has 4,200 miles on it, has taken me through two states’ worth of singletrack, and still draws comments from riders on $3,000 machines who cannot believe what I paid. The secret is not that I got lucky with a magic bike. It is that I invested $180 in targeted upgrades, maintained it religiously, and rode it on terrain matched to its capabilities rather than trying to force it into situations that demanded more. Getting the most value from an affordable mountain bike is a skill—understanding which $30 upgrades deliver $300 worth of performance improvement, which maintenance habits triple component lifespan, and which riding techniques compensate for spec-sheet limitations that would otherwise limit your trail experience. This mountain bike review approach focuses on maximizing what you have rather than constantly lusting after what you do not.
What Upgrades Deliver the Biggest Performance Gains on a Budget Bike?
Three upgrades transform affordable mountain bikes more than any others: proper trail tires ($60–$80), quality brake pads ($15–$25), and ergonomic grips ($20–$30)—together costing under $130 but delivering performance improvements that would otherwise require spending $500+ more on the initial bike purchase.
Upgrade priority ranked by impact-per-dollar:
| Upgrade | Cost | Performance Impact | Why It Matters |
|---|---|---|---|
| Trail tires (2.3″+ aggressive tread) | $60–$80/pair | Massive—transforms grip, confidence, braking | Factory tires are the weakest component on most budget bikes |
| Quality brake pads (metallic/sintered) | $15–$25/set | High — better stopping power and consistency | Factory organic pads wear fast and fade when hot |
| Ergonomic grips with lock-on | $20–$30 | High — eliminates hand numbness and fatigue | Stock grips cause pain that limits ride duration |
| Comfortable saddle | $40–$60 | High — enables longer rides without pain | Factory saddles prioritize cost over anatomy |
| Platform pedals with pins | $25–$50 | Moderate — better foot grip and control | Stock plastic pedals slip when wet or muddy |
| Tubeless tire conversion | $40–$60 (sealant + valves) | Moderate — eliminates flats, allows lower pressure | Lower pressure = more grip + more comfort |
Total for all six upgrades: $200–$305. This investment on a $500 bike creates a $700–$800 riding experience. The key insight: these upgrades address the specific components where budget bikes compromise most aggressively. Frames, forks, and drivetrains at the $500 level are adequate — it is the contact points and tires that desperately need improvement.
How Does Proper Maintenance Multiply Your Budget Bike’s Value?
Consistent maintenance extends an affordable mountain bike’s reliable lifespan from 2–3 years (neglected) to 7–10+ years (maintained)—effectively multiplying your investment value by 3–4x through discipline rather than additional spending.
Maintenance impact on longevity:
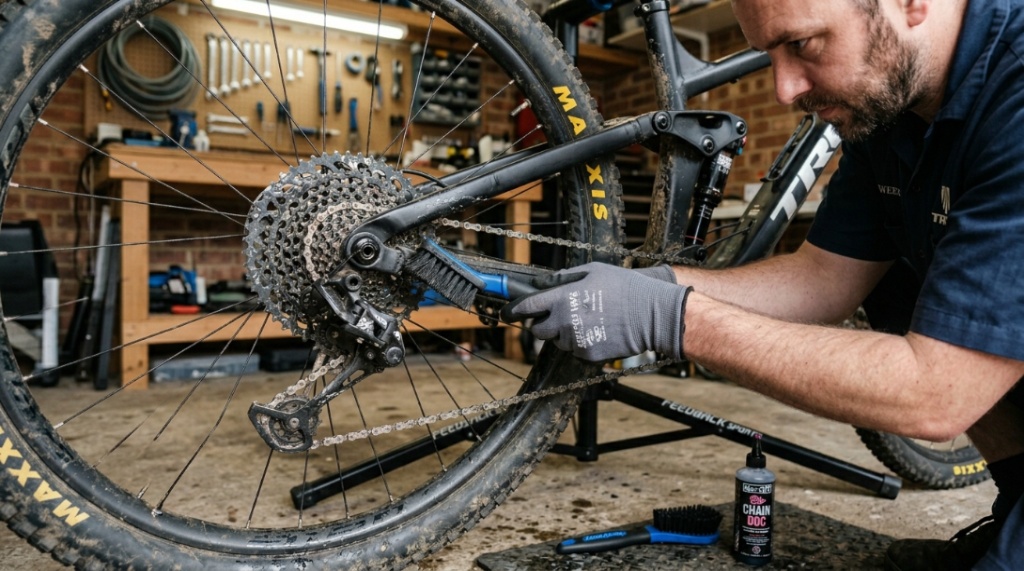
- Chain maintenance (5 min/week): Proper lubrication and timely replacement ($25–$40 chain every 2,000 miles) saves $150+ in cassette and chainring replacements caused by worn chains grinding expensive components.
- Brake care (10 min/month): Pad inspection, rotor cleaning, and brake bleed maintenance keep stopping power consistent. Neglected brakes lose 30–50% effectiveness within 6 months.
- Suspension service (annually, $50–$80 shop or DIY): Fork seal replacement and oil change maintain plush performance. Neglected forks become harsh, unresponsive, and eventually leak—requiring a $150+ rebuild.
- Bearing inspection (every 6 months): Headset, bottom bracket, and wheel bearings checked for play prevent catastrophic failure. $10 bearing replacement prevents $200+ damage from failed bearings destroying frames or hubs.
- Bolt torque check (monthly): Stem, handlebar, seat clamp, and axle bolts verified tight prevent the sudden failures that cause crashes and component damage.
The math: $150–$250/year in maintenance cost preserves a $500 bike for 7–10 years. Without maintenance, the same bike needs replacement in 2–3 years (total: $1,000–$1,500 in bikes). Maintenance discipline saves $500–$1,000 over a decade while delivering a consistently better riding experience.
What Riding Techniques Compensate for Budget Bike Limitations?
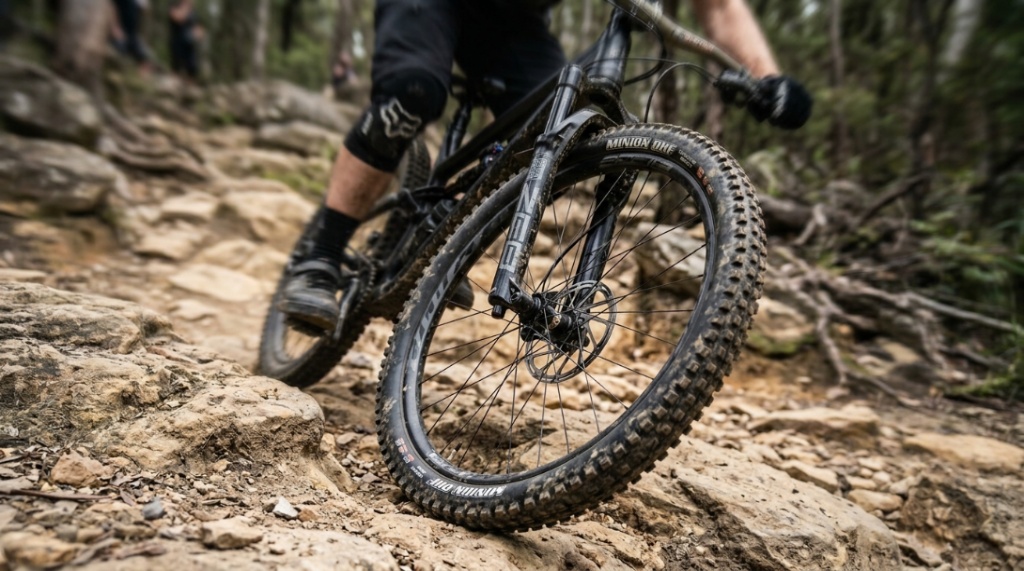
Three riding techniques compensate for lower-spec components: momentum management (maintaining speed through rough sections rather than relying on suspension), line selection (choosing smoother paths that reduce component stress), and body-English weight shifting (using your legs as suspension to absorb impacts the fork cannot handle alone).
Budget-compensating techniques:
- Momentum management: Budget forks and rigid rear ends struggle with slow-speed technical riding where suspension needs to absorb repeated hits. Solution: Carry more speed through rough sections—momentum smooths what suspension cannot. Look ahead, maintain pedal pressure, and let the bike float over bumps rather than stopping dead in them.
- Line selection: Expensive bikes power through the roughest line. Budget bikes reward choosing the smoothest available path. Scan 10–15 feet ahead for the line with fewest large rocks and roots. This is not “cheating”—it is the skill that makes good riders fast on any bike.
- Weight shifting: Stand on pedals with bent knees and elbows, letting your legs act as rear suspension. Shift weight backward for drops, forward for steep climbs, and side-to-side through corners. Your body provides 4+ inches of “suspension travel” that costs nothing and works on any bike.
- Braking technique: Budget brakes have less power and modulation than premium ones. Compensate by braking earlier, using both brakes simultaneously (70% front, 30% rear), and braking before turns rather than during them where traction is reduced.
- Gear anticipation: Budget drivetrains shift less crisply under load. Shift before you need the gear — before the steep section begins, not during it. Anticipatory shifting reduces stress on the drivetrain and prevents the missed shifts that budget components exhibit under high load.
How Do You Know When Your Budget Bike Genuinely Needs Upgrading?
Upgrade your budget bike (or replace it) when your skills genuinely exceed the bike’s capabilities—evidenced by specific, repeated limitations on trails you ride regularly: consistent brake fade on descents, fork bottoming on moderate terrain, or frame flex that causes tracking instability at speeds within your comfort zone.
Genuine upgrade indicators (not just upgrade desire):
- Brake fade on every descent: If your brakes consistently lose power during moderate descents despite fresh pads and proper bleeding, you have outgrown mechanical brakes or undersized rotors. Upgrade to hydraulic or larger rotors.
- Fork bottom-out on moderate terrain: If the fork uses all its travel on terrain that is not extreme, you need more travel or a better-damped fork. This is a genuine limitation, not a preference.
- Drivetrain cannot maintain gear under load: Chain skipping, ghost shifting, or inability to stay in gear on climbs despite proper adjustment indicates components worn beyond service life or genuinely inadequate for your riding intensity.
- You avoid trails your friends ride comfortably: If specific trails are beyond your bike’s (not your skill’s) capabilities, and those trails are where your riding community goes, the bike is limiting your social riding experience.
- Repeated component failures: Breaking the same part repeatedly (bent hangers, cracked rims, broken spokes) despite proper riding technique indicates the component is underspecified for your use case.
NOT genuine upgrade indicators:
- Seeing other riders on more expensive bikes (comparison, not limitation)
- Wanting a newer model for aesthetics (desire, not need)
- Marketing telling you your bike is inadequate (manipulation, not reality)
- General sense that “better is out there” without specific riding limitations
For honest assessments of what affordable mountain bikes genuinely deliver versus their limitations, the Schwinn Traxion mountain bike review provides a realistic evaluation of budget bike capabilities and limitations—helping you understand where affordable bikes excel and where they genuinely need help.
How Do You Maximize Resale Value When You Do Upgrade?
Maximize resale value by: maintaining the bike in excellent mechanical condition; keeping original components (include removed parts with the sale); documenting maintenance history; cleaning thoroughly before listing; and pricing at 40–50% of original retail for bikes in good condition with 1–3 years of use.
Resale-maximizing practices:
- Keep original parts: When you upgrade components, store the originals. Many buyers want complete stock bikes. Including original parts can increase resale by 10–15%.
- Document maintenance: A simple log showing oil changes, bearing replacements, and service dates demonstrates care that justifies a higher asking price.
- Deep clean before listing: Degrease drivetrain, polish frame, clean wheels, and inflate tires. First impressions drive pricing. A clean $500 bike sells faster at $280 than a dirty one at $200.
- Photograph properly: Clean background, good lighting, multiple angles, including drivetrain close-up. Show the condition honestly—hiding damage destroys trust and kills deals.
- Price realistically: Used bikes sell at 40–60% of retail for 1–2 years old in good condition. 30–40% for 3–4-year-olds. Below 30% for older or heavily worn bikes. Price fairly and sell quickly rather than overpricing and waiting months.
Maximizing value from a budget mountain bike isn’t just about trail performance; it’s also about increasing versatility. When weather or light stops your outdoor adventures, adapting your setup allows for consistent training. Learning how to Set Up an Indoor Bike Trainer for Maximum Comfort lets you convert your everyday ride into a valuable, stable fitness platform, ensuring you get the most out of your investment year-round.
Conclusion
Getting the most value from an affordable mountain bike combines three strategies: targeted upgrades that address specific weaknesses (tires, brake pads, and grips—$130–$200 total); disciplined maintenance that extends lifespan from 2–3 years to 7–10+ years; and riding techniques that compensate for component limitations through skill rather than spending. Together, these strategies transform a $500 bike into an $800+ riding experience that lasts a decade—delivering better cost-per-ride value than expensive bikes purchased without maintenance discipline.
The riders who get the most from budget bikes share a mindset: they ride what they have to its maximum capability before spending more. They upgrade strategically based on specific limitations rather than general desire. They maintain religiously because prevention is cheaper than replacement. And they develop skills that make any bike faster rather than buying speed they have not earned through practice. Adopt this mindset, and your affordable mountain bike delivers more joy per dollar than any premium machine ridden by someone still chasing the next upgrade.
What is the single best upgrade or maintenance habit that transformed your budget bike? Share your value-maximizing tip below.
Frequently Asked Questions
Is it worth upgrading a cheap mountain bike, or should I save for a better one?
Upgrade if the frame is sound and the total upgrade cost stays under 50% of a replacement bike’s price. A $500 bike with $200 in targeted upgrades outperforms a stock $700 bike in the areas you upgraded. However, if upgrades would total $400+ on a $500 bike, that money is better saved toward a $900–$1,000 complete bike with superior everything.
What is the first thing I should upgrade on a budget mountain bike?
Tires. Factory tires on budget bikes are the single biggest performance limiter — often semi-slick or road-oriented designs with minimal trail grip. Spending $60–$80 on proper trail tires (2.3″+ width, aggressive tread) transforms confidence, braking grip, and cornering capability immediately. No other upgrade delivers this much improvement per dollar.
How many miles can I expect from a $500 mountain bike?
With proper maintenance: 5,000–10,000+ miles from the frame, 1,500–3,000 miles per chain, 1,000–2,000 miles per tire, and 500–1,500 miles per brake pad set. The frame outlasts multiple component sets. Budget for $150–$250/year in consumables and a $500 bike delivers years of reliable mileage.
Should I convert my budget bike to tubeless?
Yes—if your rims are tubeless-ready (check manufacturer specs). Tubeless eliminates pinch flats, allows lower tire pressure (more grip and comfort), and saves the weight of tubes. The conversion costs $40–$60 (sealant + valves) and provides ongoing savings versus buying replacement tubes. One of the highest-value modifications available.
Can a budget bike keep up with expensive bikes on trails?
On moderate trails, an affordable bike with a skilled rider keeps up with expensive bikes ridden by average riders. Fitness and technique determine speed more than equipment on 80% of trails. Only on highly technical terrain with sustained rough descents do expensive bikes provide a meaningful speed advantage over well-maintained budget options.
When should I stop putting money into my budget bike?
Stop investing when the frame develops cracks or fatigue, total upgrades exceed 50% of a better complete bike’s cost, or your specific riding limitations cannot be solved by component upgrades (frame geometry mismatch or inadequate frame stiffness). At that point, sell the current bike and put the combined budget toward a better complete replacement.
What maintenance can I do myself versus needing a bike shop?
DIY: chain lubrication, tire changes, brake pad replacement, cable adjustment, bolt tightening, basic cleaning. Shop-recommended: suspension service, wheel truing, hydraulic brake bleeding, bottom bracket replacement, headset service. Learning basic maintenance saves $200–$400/year in shop fees and ensures your bike is always ride-ready without scheduling delays.