Setting up an indoor bike trainer the right way can transform your riding experience. A poor setup leads to discomfort, poor performance, and even injury. However, a well-planned setup keeps you riding longer, stronger, and happier. This guide walks you through everything you need to know to get the most out of your indoor training sessions.
Choosing the Right Location
The first step is finding the best spot in your home. You want a space with good ventilation because indoor cycling generates a lot of heat. A garage, spare room, or basement works well. Make sure the floor is level and has enough room for you to move freely.
Lighting also matters. Natural light keeps your mood up during long sessions. If that is not possible, bright overhead lighting works just as well. Additionally, having your setup near a power outlet is important for fans, screens, or smart trainer connections.
Using a Bike Trainer Mat
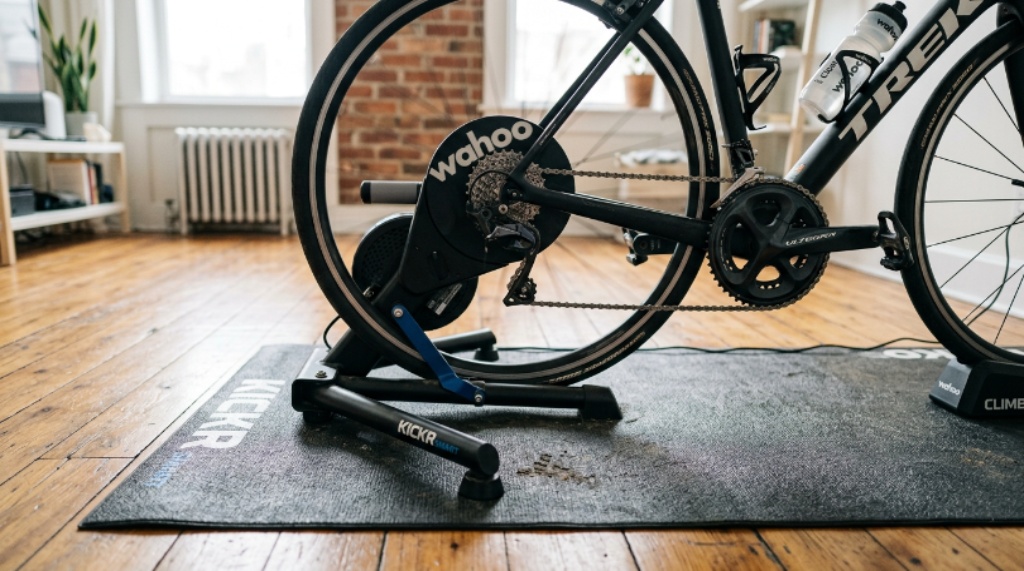
One of the most important accessories you can add to your setup is a bike trainer mat. This simple piece of equipment does several things at once.
First, it protects your floor from sweat and vibration. Indoor cycling produces a surprising amount of sweat, and without a mat, it can damage hardwood floors or stain carpet. Second, a bike trainer mat reduces noise and vibration. This is especially helpful if you live in an apartment or train early in the morning.
Third, the mat keeps your trainer stable. Rollers and direct-drive trainers can shift slightly during hard efforts. A grippy mat prevents that movement and keeps your setup safe.
When choosing a mat, look for one that is at least 3mm thick. High-density foam or rubber materials work best. Make sure it is large enough to fit your trainer and catch any sweat that drips off your bike.
Setting Up Your Bike Correctly
Getting your bike position right is the foundation of comfortable indoor cycling. Unlike outdoor riding, you cannot shift your weight around as much. Therefore, small fit issues become much bigger problems during longer sessions.
Start with saddle height. When your pedal is at the bottom of the stroke, your knee should have a slight bend. Too high and your hips will rock. Too low and your knees will ache.
Next, check your saddle fore-aft position. Your knee should sit directly over the pedal axle when the crank is at the three o’clock position. This keeps your power transfer efficient and your joints aligned.
Finally, set your handlebar height. Many riders prefer to raise the bars slightly for indoor training. This reduces strain on the lower back and neck. However, if you are training for a specific race position, keep it the same as your outdoor setup.
Controlling Temperature and Airflow
Heat is one of the biggest challenges in indoor training. Without wind chill from forward movement, your body heats up fast. Therefore, managing airflow is essential for comfort and performance.
A good fan makes a huge difference. In fact, most experienced indoor cyclists use at least one large fan pointed directly at their upper body. Some use two fans for full coverage.
Keep the room temperature cool if possible. Open a window or run an air conditioner. Warmer rooms lead to higher heart rates and faster fatigue. Even a few degrees cooler can improve how you feel during a hard session.
Wearing light, breathable clothing also helps. Opt for moisture-wicking fabrics that pull sweat away from your skin. Avoid cotton, which traps heat and becomes heavy when wet.
Managing Sweat and Cleanliness
Sweat management is something many beginners overlook. However, it is critical for both your comfort and the longevity of your equipment.
Use a sweat guard over your bike’s top tube and headset. These are inexpensive covers that catch drips before they reach your bearings and cables. Sweat is surprisingly corrosive and can damage your bike over time.
Keep a towel nearby. Wiping down your face and handlebar during longer rides keeps things more comfortable. After every session, wipe down your bike and trainer with a dry cloth.
Place a sweat net or absorbent mat under your front wheel as well. Many cyclists rest their front wheel on a riser block, and sweat tends to pool in that area.
Entertainment and Mental Focus
Long indoor sessions can feel mentally tough. Having a plan for entertainment or structured workouts makes a big difference.
Many riders use a smart TV or tablet to watch cycling videos or stream workouts. Apps like Zwift, TrainerRoad, or Wahoo SYSTM offer guided sessions that keep you engaged and on track.
Music is another great motivator. Create a playlist that matches the intensity of your planned workout. Upbeat tracks for intervals, steady beats for endurance rides.
Additionally, some riders prefer podcasts or audiobooks during lower-intensity sessions. Whatever keeps you on the bike longer is the right choice for you.
Nutrition and Hydration During Indoor Sessions
Staying fueled and hydrated matters more indoors than outdoors. Because you sweat more, your fluid needs are higher. Keep a large water bottle or two on hand at all times.
For sessions lasting longer than 60 minutes, consider having a carbohydrate source nearby. Energy gels, bars, or a simple banana all work well. Eating mid-session prevents energy crashes and keeps your power output consistent.
Set your drinks and snacks somewhere within easy reach before you start. Stopping to hunt for food breaks your rhythm and interrupts your focus.
Following Indoor Cycling Tips for Long-Term Consistency
Staying consistent is what turns occasional sessions into real fitness gains. A few solid indoor cycling tips can help you stay on track week after week.
Schedule your rides like appointments. Put them in your calendar and treat them as non-negotiable. Having a set time reduces decision fatigue and builds habit.
Start with shorter, more focused sessions rather than long unstructured ones. A 45-minute workout with a clear goal is more valuable than 90 minutes of drifting.
Track your progress. Whether you use a training app or a simple notebook, recording your sessions shows you how far you have come. This builds motivation over time.
Conclusion
Setting up an indoor bike trainer for maximum comfort involves more than just placing your bike on a stand. The right location, a quality bike trainer mat, proper bike fit, good airflow, and smart sweat management all work together to create a setup that supports real training. Add in entertainment, nutrition, and consistent scheduling, and you have everything you need to ride well indoors. Whether you are new to indoor cycling or looking to improve your current setup, these steps will help you ride more comfortably and effectively all year long.
Frequently Asked Questions
What is the best type of bike trainer mat to buy?
Look for a high-density foam or rubber mat that is at least 3mm thick and wide enough to cover your trainer footprint and catch dripping sweat. Thicker mats absorb more vibration and last longer.
How much space do I need for an indoor bike trainer setup?
You need at least 2 meters of length and 1.5 meters of width. However, more space is better, especially if you want to add a fan or place a screen in front of you.
How do I stop my indoor trainer from being so loud?
Using a direct-drive trainer instead of a wheel-on trainer significantly reduces noise. Placing a thick mat underneath and ensuring all bolts are tight also helps minimize vibration and sound.
How often should I clean my bike after indoor training sessions?
Wipe down your frame, saddle, and handlebars after every session. Do a deeper clean of the drivetrain once a week if you ride daily, or after every few sessions if you ride less often.
Do I need a riser block for my front wheel?
A riser block is not required, but it helps level your bike when using a rear-wheel trainer. It also reduces strain on the front fork and makes the ride feel more natural. Some trainers include one in the box.