The best approach combines a properly certified helmet, effective lights, reflective gear, and practical visibility accessories. Match each item to your riding time, traffic exposure, weather, speed, and route instead of buying accessories randomly. In 2024, 1,103 bicyclists died in traffic crashes, according to federal transportation data. Nearly three quarters of bicyclist deaths occurred in urban areas, where traffic and visibility create added challenges.
Start With Your Actual Riding Conditions
Bike safety accessories work best when they solve specific risks on your regular routes. Therefore, start by examining when, where, and how you normally ride.
A commuter needs different equipment from a recreational rider on quiet trails. Likewise, someone riding before sunrise needs stronger visibility equipment than someone riding midday.
Ask yourself these questions before shopping:
- When do I usually ride?
• Do I ride near fast moving traffic?
• Do I commute through busy intersections?
• Do I ride during rain or fog?
• How long does each trip usually last?
• Do I carry equipment or ride with children?
• Does my route include poorly lit roads?
Your answers create a practical safety profile. Then, build your accessory setup around the risks you actually face.
Choose the Helmet Before Everything Else
A helmet should sit at the top of your safety equipment list. It protects your head during falls and collisions, but only when it fits correctly and meets applicable safety requirements.
Federal safety authorities continue warning consumers about bicycle helmets that fail mandatory requirements. Recent recalls show why certification, fit, and product legitimacy matter more than appearance or bargain pricing.
Look for Proper Certification
Buy a bicycle helmet that complies with the applicable federal bicycle helmet safety standard. Check the inside labeling and product information before using the helmet.
Do not assume every helmet sold online provides adequate protection. Instead, verify its certification information and inspect the product carefully when it arrives.
Get the Right Helmet Size
Measure your head according to the manufacturer’s sizing instructions. Then compare your measurement with the helmet’s stated size range.
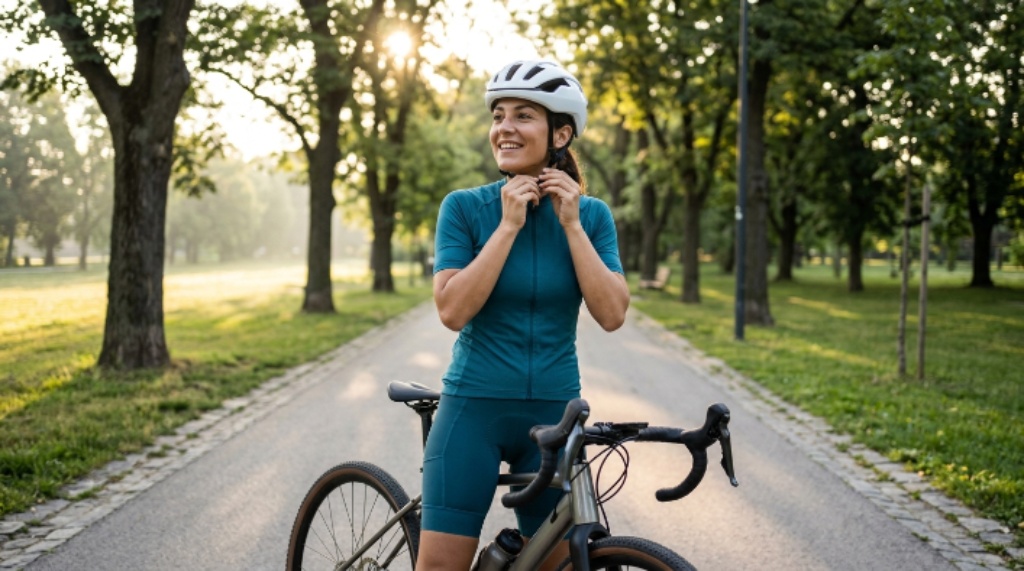
A properly fitted helmet should sit level on your head. The front edge should sit above your eyebrows without exposing too much forehead.
Adjust the retention system until the helmet feels secure. You should not feel significant movement when you shake your head gently.
Check the Fit Before Every Ride
Helmet fit can change after strap adjustments, hair changes, or prolonged use. Therefore, spend a few seconds checking the position before every trip.
Use this quick fit test:
- Keep the helmet level.
• Adjust the side straps around your ears.
• Tighten the chin strap comfortably.
• Keep the buckle centered beneath your chin.
• Confirm that the helmet does not shift easily.
Replace a helmet after a serious impact, even when visible damage appears minimal. Also replace damaged, cracked, or degraded helmets rather than continuing to rely on them.
Select Bike Lights Based on Visibility, Not Decoration
Bike lights serve two important purposes. They help you see hazards, and they help other road users detect your position.
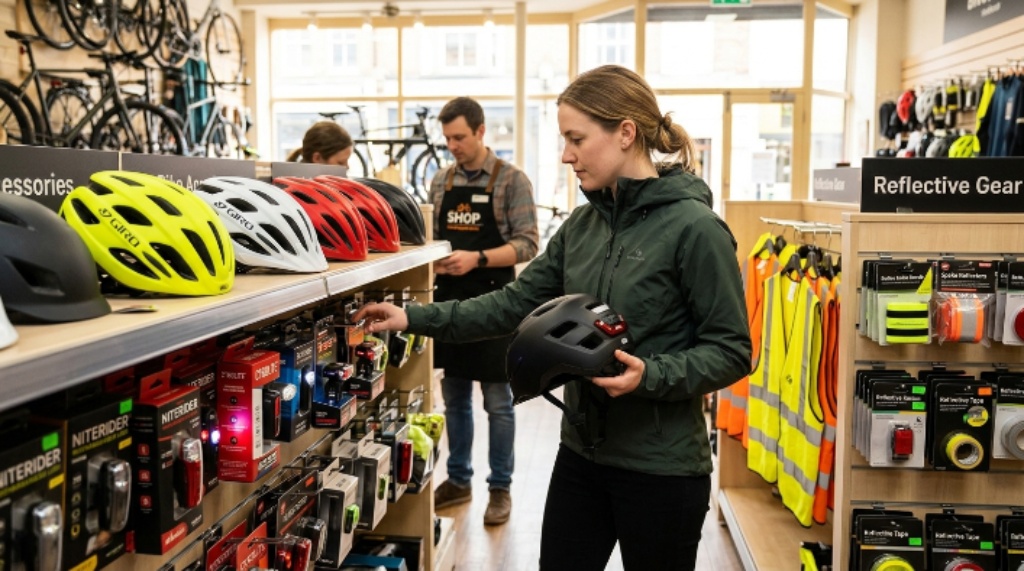
For road riding at night or during poor visibility, use a white front light and a red rear light. Reflectors provide additional visibility but should not replace active lights when conditions demand them.
Choose the Right Front Light
Think about your front light according to your route rather than brightness alone. A well lit urban street requires different performance from a dark rural road.
Consider these factors:
- Beam pattern
• Light output
• Runtime
• Recharge time
• Mount stability
• Weather resistance
• Flash and steady modes
A focused beam can help illuminate your path on darker roads. Meanwhile, a broader beam can improve peripheral visibility around intersections and shared paths.
Avoid aiming a powerful front light directly into approaching riders’ or drivers’ eyes. Angle it toward the road so it improves your visibility without creating unnecessary glare.
Choose an Effective Rear Light
A rear light should make your position obvious from behind. Select a model that remains visible from different angles when possible.
Look for dependable mounting rather than impressive specifications alone. A bright light becomes useless when vibration makes it point toward the ground.
Consider using a steady mode when road conditions require clear position recognition. Flashing modes can also attract attention, but local rules may affect acceptable use.
Use Reflective Gear Strategically
Reflective gear works differently from active lighting. It catches available light and sends it back toward the source, helping drivers recognize your presence.
Therefore, place reflective material where headlights can easily illuminate it. Ankles, legs, wrists, torso areas, and moving body parts can provide useful visual signals.
Add Reflective Elements to Moving Parts
Reflective ankle bands can create a noticeable movement pattern while you pedal. That movement can help distinguish a cyclist from stationary roadside objects.
Reflective shoe covers and pedal reflectors can provide similar benefits. Choose accessories that remain secure and do not interfere with pedaling or braking.
Use Reflective Clothing for Low Light
A reflective vest or jacket can increase your visual presence during darkness. However, reflective material works best when headlights reach it.
Bright colors also help during daylight conditions. Therefore, consider clothing that combines daytime visibility with nighttime reflective elements.
Consider Visibility From Every Direction
Many riders focus on what appears directly ahead. However, traffic approaches from behind, beside, and across intersections.
Build your visibility system around a full 360 degree view. Add lights or reflective elements where they address gaps in your existing setup.
A practical arrangement might include:
- White front light
• Red rear light
• Reflective ankle bands
• Reflective vest
• Reflective backpack panel
• Reflective wheel or frame elements
You do not need every accessory listed above. Instead, identify the directions where other road users have difficulty seeing you.
Add Turn Signals Carefully
Some cyclists use electronic turn signals to communicate intentions. These devices can provide another communication layer, especially during commuting.
However, electronic signals should never replace hand signals and predictable riding. Drivers may not recognize every aftermarket signaling system.
Choose a turn signal only when it remains easy to operate. The controls should not force you to remove attention from traffic.
Consider Gloves for Control and Protection
Cycling gloves provide more than comfort. They can improve grip and offer some protection during a fall.
Look for gloves that fit securely without restricting finger movement. Breathable materials can help during warm weather, while insulated options suit colder rides.
Padding can reduce pressure on your palms during longer trips. However, excessive padding may reduce your feel for the handlebars.
Protect Your Eyes With Appropriate Eyewear
Eye protection helps shield your vision from wind, dust, insects, and road debris. Clear lenses work well during darkness, while tinted lenses suit bright daytime conditions.
Avoid very dark lenses when riding in low light. Your eyewear should improve visual comfort without reducing your ability to identify hazards.
Wraparound designs can provide additional side protection. Choose lenses that remain clear and stable when you move your head.
Add Weather Protection When Your Route Requires It
Weather can change how well safety accessories perform. Rain can reduce visibility, fog can scatter light, and cold temperatures can affect battery performance.
Therefore, consider weather resistance when selecting lights and electronic accessories. Look for secure mounts that remain stable during wet conditions.
Water resistant equipment can handle normal exposure better than equipment designed only for dry environments. Still, follow the manufacturer’s charging and storage instructions carefully.
Think About Battery Reliability
A rechargeable light is only useful when it has enough power for your trip. Consequently, battery management should become part of your riding routine.
Check battery levels before every evening ride. Recharge lights after longer trips instead of waiting until they become nearly empty.
Carry a backup light for long commutes or remote rides. A compact backup can provide valuable protection if your primary light fails.
Do Not Ignore Mounting Hardware
A good accessory can fail when its mounting system performs poorly. Loose mounts can change light direction, detach equipment, or create distractions.
Test every mount before riding in traffic. Shake the bicycle gently and confirm that each accessory stays firmly attached.
Avoid mounting equipment where it interferes with brakes, cables, steering, or controls. Also check mounts periodically because vibration can loosen hardware over time.
Match Accessories to Different Riding Scenarios
Your ideal setup depends heavily on your riding environment. A single universal package rarely makes sense for every cyclist.
For Daytime Commuting
Prioritize a properly fitted helmet and strong daytime visibility. Add front and rear lights when traffic conditions or local requirements make them appropriate.
Bright clothing can improve daytime conspicuity. Reflective elements add another layer when your commute extends into darker hours.
For Night Riding
Use a white front light and red rear light. Add reflective clothing or accessories to make your body more noticeable.
Carry backup lighting for longer trips. Also verify your route before riding through areas with poor lighting or limited shoulder space.
For Recreational Trail Riding
Focus on helmet fit, front visibility, rear visibility, and eye protection. Add gloves and weather protection when your route or conditions justify them.
Technical trails may require additional equipment. Consider the terrain, riding speed, obstacles, and expected weather before adding specialized accessories.
For Family Cycling
Children need properly fitted helmets and equipment suited to their size. Parents should also prioritize visibility when riding near roads or during evening hours.
Check every child’s helmet before departure. Keep accessory controls simple enough that children cannot accidentally interfere with essential equipment.
Avoid These Common Buying Mistakes
Many riders spend money on features while overlooking basic safety performance. Avoiding a few common mistakes can create a better setup without unnecessary equipment.
Watch for these problems:
- Buying a helmet because it looks stylish
• Using one weak light for every riding condition
• Ignoring rear visibility
• Wearing reflective gear only during daytime
• Using loose accessory mounts
• Forgetting battery checks
• Adding equipment that distracts from riding
• Assuming expensive products always perform better
The best accessory should solve a real problem. If an item adds complexity without improving protection, visibility, or control, reconsider it.
Build a Simple Bike Safety Checklist
A short pre ride inspection can prevent equipment problems from becoming road hazards. Make the checklist simple enough that you actually use it.
Before leaving, check:
- Helmet position and straps
• Front light operation
• Rear light operation
• Reflective gear placement
• Tire condition
• Brake function
• Accessory mounts
• Battery levels
• Weather conditions
This inspection should take only a few minutes. However, it can reveal problems that become serious once you enter traffic.
Review Your Setup After Real Rides
The first equipment setup rarely becomes perfect immediately. Real riding exposes weaknesses that shopping descriptions cannot reveal.
After several rides, ask what worked and what failed. Did your rear light remain visible, or did your clothing disappear against dark surroundings?
Also notice discomfort and distractions. An accessory that constantly shifts or causes irritation may reduce your attention even when it provides useful protection.
Know When to Replace Safety Accessories
Safety equipment does not last forever. Regular exposure to sunlight, sweat, impacts, moisture, and vibration can affect materials.
Inspect helmets for damage and deterioration. Replace damaged equipment rather than trying to repair critical protective components.
Check lights for battery degradation and unreliable switches. Replace worn mounts, cracked housings, frayed straps, and loose attachment points promptly.
The Best Setup Is Balanced, Not Excessive
Choosing bike safety accessories does not mean attaching every available gadget to your bicycle. Effective safety comes from combining protection, visibility, control, and reliability.
Start with a certified, properly fitted helmet. Then add front and rear lights, reflective elements, and other equipment based on your actual riding conditions.
Frequently Asked Questions
What bike safety accessories should every rider have?
Every rider should have a properly fitted helmet, dependable lights when needed, and visibility equipment suited to riding conditions.
Are bike lights better than reflectors?
Active lights generally provide stronger detection than passive reflectors, especially during darkness and poor visibility.
How should a bicycle helmet fit?
A helmet should sit level, remain secure, and stay stable without excessive movement during normal riding.
Do reflective clothes work during the daytime?
Reflective materials work best when illuminated, while bright clothing can improve visibility during daylight.
How often should I check bike safety accessories?
Check essential accessories before every ride and inspect equipment more thoroughly whenever damage, wear, or performance changes appear.
Conclusion
The right bike safety accessories create a practical safety system rather than a collection of gadgets. Start with helmet protection, then address visibility with suitable front lights, rear lights, and reflective gear.
Next, consider your route, riding schedule, weather, traffic exposure, and personal comfort. Finally, inspect your equipment regularly and replace anything damaged or unreliable.
Before your next ride, review your current setup against the checklist above. Make one useful improvement today, then build your equipment around the conditions you actually encounter.
About Author
