The best bike light depends on where, when, and how you ride. Start with a suitable brightness level, then compare beam shape, battery life, mounting security, visibility, and charging options. A good setup should help you see hazards while making you obvious to drivers from every useful angle.
Night riding deserves serious attention because visibility changes dramatically after sunset. NHTSA reports that 56% of bicyclist fatalities occurred during dawn, dusk, or nighttime conditions in 2021. The agency also reports that bicyclists accounted for 2.2% of total traffic fatalities that year. These figures show why lighting should support both seeing and being seen. The right light can improve your view, signal your position, and give other road users more time to react.
Start With Your Riding Environment
Before comparing lumens or battery claims, consider your normal riding environment. A commuter on bright city streets needs a different light from a trail rider on an unlit path.
Think about these factors:
- Where you ride: City streets, bike paths, rural roads, trails, or mixed routes.
- When you ride: Daylight, dusk, nighttime, or early morning.
- Traffic conditions: Heavy traffic requires stronger visibility from multiple angles.
- Riding speed: Faster riding requires more useful forward illumination.
- Weather: Rain, fog, and wet roads can reduce useful visibility.
- Ride length: Longer trips demand better battery endurance and charging options.
Once you understand these conditions, shopping becomes much easier. Instead of buying the brightest light available, you can match performance to your actual needs.
Understand Lumens Before Buying
Lumens measure the total amount of visible light produced by a lamp. However, a higher lumen number does not automatically create better visibility.
A 1,000 lumen light with poor beam control can perform worse than a lower output light with an effective beam. Therefore, treat lumens as one specification rather than the entire buying decision.
A Practical Brightness Guide
Different riding environments call for different output levels:
- 50 to 150 lumens: Suitable for daytime visibility and low traffic areas.
- 150 to 400 lumens: Useful for urban riding and well lit streets.
- 400 to 800 lumens: Suitable for darker roads and mixed commuting.
- 800 to 1,500 lumens: Better for unlit roads and faster nighttime riding.
- Above 1,500 lumens: Useful for demanding trails and very dark environments.
These ranges provide practical starting points rather than strict rules. Your ideal output depends heavily on beam design, riding speed, road conditions, and surrounding light.
Focus on Beam Pattern, Not Just Brightness
A strong bike light should put light where you need it. A wide flood beam can reveal edges, while a focused beam can illuminate distant hazards.
For urban riding, choose a beam that provides useful forward coverage without creating excessive glare. On dark roads, prioritize a balanced beam that reaches far enough ahead for your speed.
Look for Controlled Light Distribution
Some modern headlights use shaped optics to direct light toward the road. This design reduces wasted illumination and can improve practical visibility.
A controlled beam also helps reduce glare for approaching cyclists and drivers. Therefore, consider beam shape whenever two lights offer similar lumen ratings.
Choose the Right Front Light
The front light serves two separate purposes. It helps you see obstacles, and it helps approaching road users notice you.
For city commuting, a moderate output often works well when street lighting already provides illumination. For dark roads, select a stronger headlight with a dependable beam and multiple brightness modes.
Consider these features:
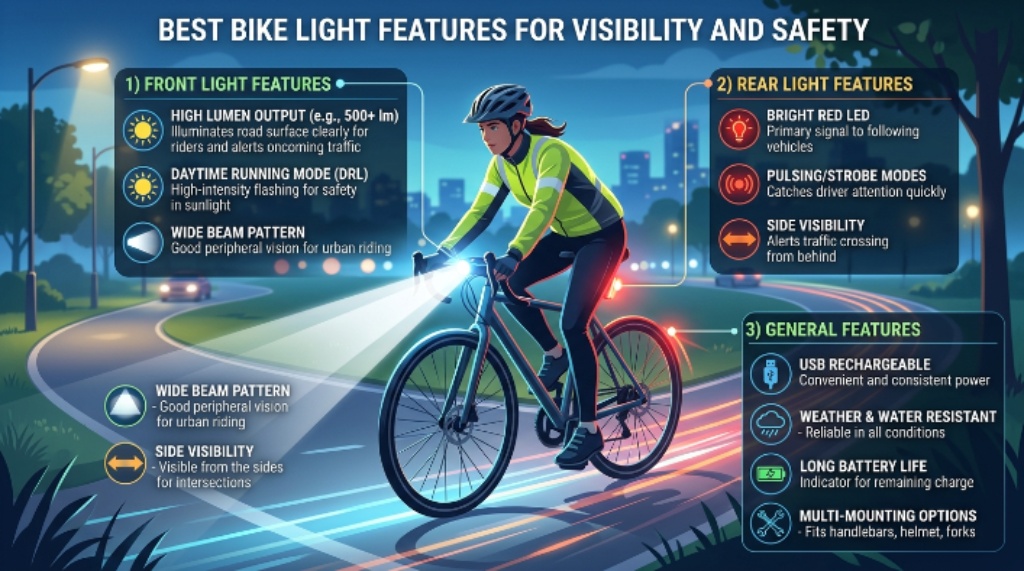
- Adjustable brightness for changing conditions.
- A focused or shaped beam for road illumination.
- Side visibility for approaching traffic.
- Secure handlebar mounting.
- A battery indicator that shows remaining charge.
- Weather resistance for unpredictable conditions.
Avoid running maximum brightness everywhere. High output can waste battery power and create unnecessary glare.
Choose the Right Rear Light
A rear light has a different job from a headlight. Its primary purpose involves making your position obvious to traffic approaching from behind.
Red light remains the standard rear lighting color. Look for a rear light with strong side visibility, especially when riding through intersections or urban streets.
Flashing or Steady Mode?
Flashing modes can attract attention during daylight and busy traffic conditions. However, a steady mode can provide a more consistent position reference at night.
Some riders benefit from using different modes for different situations. Use a brighter attention mode during daylight, then switch to a controlled setting after dark.
Check Side Visibility
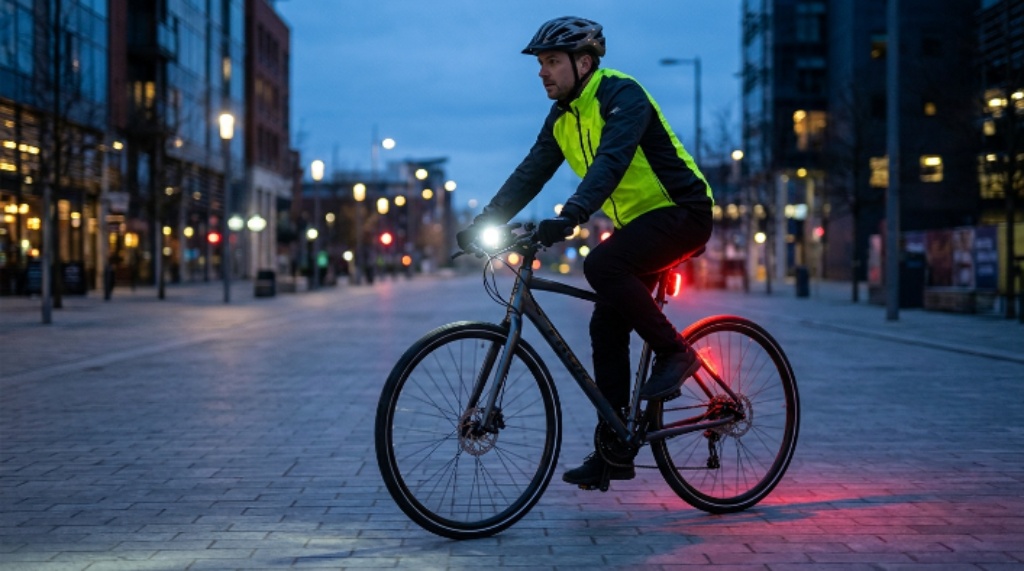
Many cyclists focus only on forward and rear visibility. However, intersections create another important problem because vehicles can approach from the side.
Side visibility helps drivers notice you before they enter your path. Therefore, consider lights with side windows, wide optics, reflective elements, or additional side lighting.
Your bicycle should also retain its required reflectors. Federal bicycle rules include reflector requirements, and reflectors provide another layer of visibility when headlights reach them.
Compare Battery Life Realistically
Manufacturers usually list battery life for specific brightness modes. The maximum runtime often applies to the lowest useful setting rather than the brightest output.
Therefore, compare runtime at the mode you actually expect to use. A light claiming twelve hours may provide much less time at its highest setting.
Calculate Your Real Battery Requirement
Start with your typical ride duration. Then add a reasonable safety margin for delays, temperature changes, and unexpected detours.
For example, a two hour commute should not rely on a light offering exactly two hours. Aim for substantially more available runtime whenever possible.
Look for:
- Runtime information for every brightness mode.
- A clear low battery warning.
- Fast charging support.
- Replaceable batteries for long trips.
- USB charging compatibility.
- A charging port with effective weather protection.
Battery capacity matters, but predictable runtime matters more.
Think About Charging Habits
A rechargeable light works well when charging fits naturally into your routine. If you regularly forget to charge accessories, battery management becomes a safety concern.
Consider where you normally store your bike. A removable light makes charging easier when your bicycle stays outdoors or in a shared storage area.
For frequent commuters, USB charging provides practical convenience. For long distance riders, carrying a compact backup light can provide extra security.
Consider Weather Resistance
Bike lights face rain, road spray, dust, and temperature changes. A light designed for dry conditions may not survive regular exposure to wet weather.
Look for an IP rating when available. Higher water resistance generally provides better protection, although you should still follow the manufacturer’s charging and storage instructions.
A waterproof light also needs a secure charging port cover. Water resistance means little if moisture can easily reach sensitive electronics.
Examine the Mounting System
Even a powerful light becomes useless if it moves during your ride. Rough pavement, potholes, and trail vibrations can gradually shift poorly designed mounts.
A good mount should hold the light firmly without damaging the handlebar. It should also allow quick removal when you park your bicycle.
Check these mounting qualities:
- Strong grip during vibration.
- Easy installation without excessive tools.
- Simple removal when needed.
- Adjustable positioning.
- Compatibility with your handlebar diameter.
- Resistance to twisting during hard braking.
Test the mount before your first night ride. Make sure the beam stays pointed correctly after several minutes of normal riding.
Match Light Output to Riding Speed
Your required seeing distance increases as your speed increases. A slow rider on a familiar street needs less forward illumination than someone descending a dark road.
At higher speeds, you need enough light to identify hazards before reaching them. That means beam distance becomes increasingly important.
However, brighter does not always mean safer. Excessive brightness can create glare, reduce contrast, and distract other road users.
Consider Daytime Visibility
Bike lights should not exist only for nighttime riding. Daytime running lights can help drivers recognize cyclists against complex backgrounds.
A daytime visibility mode usually prioritizes attention rather than road illumination. Short flashes or distinctive patterns can help your bicycle stand out in traffic.
Still, use flashing modes responsibly. Avoid settings that make it difficult for other cyclists or drivers to judge your position.
Use Lights With Reflective Gear
Lights work best when they form part of a larger visibility system. Reflective clothing, reflective accessories, and bicycle reflectors can improve your visibility from additional angles.
For example, reflective ankle bands can create noticeable movement when illuminated by headlights. Reflective elements on bags, jackets, and helmets can also increase your visible outline.
Think of visibility as a layered system:
- Front light: Helps you see and signals your presence.
- Rear light: Shows traffic where you are.
- Reflectors: Return vehicle headlights toward approaching drivers.
- Reflective gear: Expands your visible body outline.
- Bright clothing: Improves daytime recognition.
Each layer solves a different visibility problem.
Avoid Common Bike Light Buying Mistakes
Many riders make predictable mistakes when comparing lights. Recognizing them can save money and prevent disappointing nighttime performance.
Buying Only by Lumen Count
A large lumen number looks impressive on packaging. Yet beam quality, optics, runtime, and mounting stability often matter more during real riding.
Ignoring Battery Performance
A powerful light becomes a poor safety tool when it dies halfway through your ride. Always compare realistic runtime at your intended brightness.
Choosing a Weak Rear Light
Some riders spend heavily on headlights while treating rear lights as an afterthought. Traffic approaching from behind makes strong rear visibility equally important.
Forgetting Side Visibility
A front and rear light may leave significant angles poorly covered. Consider how drivers see your bicycle at intersections and during turns.
Using Maximum Brightness Constantly
Maximum output consumes more battery and can create unnecessary glare. Use the lowest effective setting that gives you adequate visibility.
Leaving Lights on the Bicycle
Removable lights can attract unwanted attention when bicycles remain outside. Take valuable lights with you whenever practical.
Build a Simple Lighting Setup
You do not need a complicated collection of accessories. A sensible setup can cover most everyday riding conditions.
For a typical commuter, consider this combination:
- One front headlight with adjustable output.
- One red rear light with steady and flashing modes.
- Reflective bicycle elements.
- Reflective clothing or accessories.
- A backup light for longer rides.
- A reliable charging cable.
This setup creates several independent visibility layers. It also gives you protection if one component fails.
How to Position Your Bike Lights
Position matters almost as much as performance. A poorly aimed headlight can illuminate the sky instead of the road.
Aim the front beam toward the riding surface. On shared roads, avoid pointing powerful headlights directly into approaching drivers’ eyes.
Mount the rear light where bags, jackets, or seat packs cannot block it. Check visibility from several angles before starting your ride.
Test Your Lights Before Every Night Ride
A quick pre ride check can prevent avoidable problems. Spend less than a minute confirming that both lights work correctly.
Check the following:
- Front light turns on normally.
- Rear light displays the correct color.
- Battery indicators show sufficient charge.
- Mounts remain tight.
- Beam direction looks correct.
- Charging ports remain closed.
- Reflective elements remain visible.
Also carry a backup plan for longer or remote rides. A compact spare light can become extremely valuable after an unexpected battery failure.
Consider Smart Lighting Features
Some modern bike lights offer automatic brightness, brake sensing, ambient light detection, or wireless control. These features can improve convenience when they work reliably.
However, smart features should support safety rather than replace basic reliability. A simple light with dependable operation can outperform a feature packed model with poor battery management.
Prioritize essential performance first. Then consider extra features that genuinely match your riding habits.
A Quick Bike Light Buying Checklist
Before purchasing, run through this short checklist:
- Riding location: Is the light suitable for your roads or trails?
- Brightness: Does the output match your environment?
- Beam: Does the pattern illuminate useful areas?
- Runtime: Does the battery last beyond your normal ride?
- Rear visibility: Can approaching traffic see you clearly?
- Side visibility: Can drivers notice you at intersections?
- Mount: Will the light stay aligned over rough surfaces?
- Weather resistance: Can it handle your typical conditions?
- Charging: Does the charging method fit your routine?
- Backup: Do you have another light for emergencies?
If a light passes these checks, it likely fits your needs better than one selected by lumen count alone.
Final Thoughts
The best way to choose bike lights involves matching the entire lighting system to your riding conditions. Focus on useful brightness, beam control, battery endurance, rear visibility, side visibility, mounting stability, and weather resistance.
Do not assume the brightest light automatically provides the safest ride. Instead, build a balanced setup that helps you see hazards while making your presence obvious to others.
Before your next night ride, inspect your lights, charge both units, and test their positioning. A few minutes of preparation can make your bicycle far easier for other road users to recognize.
Frequently Asked Questions
How Many Lumens Should a Bike Light Have?
Most urban riders can start around 150 to 400 lumens, while dark roads may require 400 to 1,500 lumens.
Is a Higher Lumen Bike Light Always Better?
No, because beam quality, glare control, runtime, and mounting stability also determine practical lighting performance.
Should a Bike Have Both Front and Rear Lights?
Yes, a white front light and red rear light provide essential visibility from opposite directions.
Is Flashing or Steady Bike Lighting Safer?
Both modes have uses, with flashing helping attention during daytime and steady lighting supporting consistent nighttime positioning.
How Long Should a Bike Light Battery Last?
Choose a light offering substantially more runtime than your normal ride duration to maintain a useful safety margin.
Take Action Before Your Next Ride
Review your usual route, riding speed, traffic conditions, and expected weather before buying new lights. Then select a balanced front and rear setup that provides dependable visibility without unnecessary glare. Finally, charge your lights and test their mounting position before riding after dark.
About Author
