A backdrop stand is an essential piece of equipment for photographers. It allows you to hang backdrops in your studio for portrait sessions or product photography. Backdrops provide a clean, consistent background and allow you to control the look of your images.
Purchasing a backdrop stand from a photography store can be quite expensive. But with some basic DIY skills and materials from your local hardware store, you can make your own for a fraction of the cost. This article will walk you through the entire process, from planning to assembly. Follow along to build your own customizable photography backdrop stand.
Overview of Building a Backdrop Stand
Constructing a backdrop stand is a relatively straightforward woodworking project. Here are the key steps we’ll cover:
- Choosing materials – Wood boards, PVC pipe, bolts, washers, etc.
- Taking measurements – Size and height based on your space and needs.
- Cutting wood boards to size – Crossbar, legs, baseboards.
- Assembling the frame – Connecting the pieces with bolts and washers.
- Adding support bars – For strength and preventing sagging.
- Painting/staining – For an attractive finish.
- Hanging backdrops – Using clasps, grommets, hooks, or clamps.
- Portability – Casters for rolling and folding legs for storage.
- Safety and use – Securing it to prevent tipping and using sandbags.
The design is completely customizable, so you can build a backdrop stand to fit your unique needs. Let’s go through the process step-by-step.
Step 1: Choose Your Materials
The main components you’ll need include:
- Wood boards – For the crossbar, legs, and baseboards. Plywood, MDF, pine boards, etc.
- PVC pipe – For support bars and crossbars. 1 1/2″ diameter recommended.
- Bolts and washers – For joining the wood pieces. 3/8″ carriage bolts work well.
- Paint/stain – To finish the wood boards. Color of your choice.
- Backdrop hanging supplies – Clips, clamps, hooks, etc. to hang fabric backdrops.
- Casters (optional) – For rolling the stand. 2 to 4 casters.
- Sandbags – For weighing down the base and preventing tipping.
Consider the overall size and height you want your backdrop stand to be when purchasing materials. The wider and taller, the more materials you’ll need. Starting small is wise for a first-time build.
Step 2: Take Measurements
Once you have your materials, it’s time to take precise measurements for cutting the wood boards. Measurements to take:
- Crossbar width – How wide the top horizontal bar should be. 6 to 8 feet is common.
- Leg height – Height from floor to top of crossbar. Standard is 8 to 10 feet tall.
- Baseboard dimensions – Length and width of bottom base rectangle. 30″ x 48″ is a good starting size.
- Support bar length – Length of vertical support bars. Usually 8 to 9 feet long.
- Wood board thickness – Thickness of all wood boards. 3/4″ plywood is a common choice.
Draft a diagram with your measurements mapped out. This will serve as your reference during cutting and assembly. Don’t rush this step – precise measuring is crucial for proper assembly later.
Step 3: Cut the Wood Boards to Size
Now it’s time to cut your boards. You’ll want to cut:
- Two crossbars – These form the top horizontal bar. Cut them to your desired stand width.
- Two legs – Cut these to the height you want your backdrop stand.
- Four baseboards – Cut them to your planned base dimensions.
- Two to four support bars – Cut these around 8 feet long to connect the legs about halfway up.
A circular saw works well for straight cuts along plywood boards. Sand cut edges smooth. Pre-drill holes for bolts in the crossbars and legs using a power drill.
Step 4: Assemble the Frame
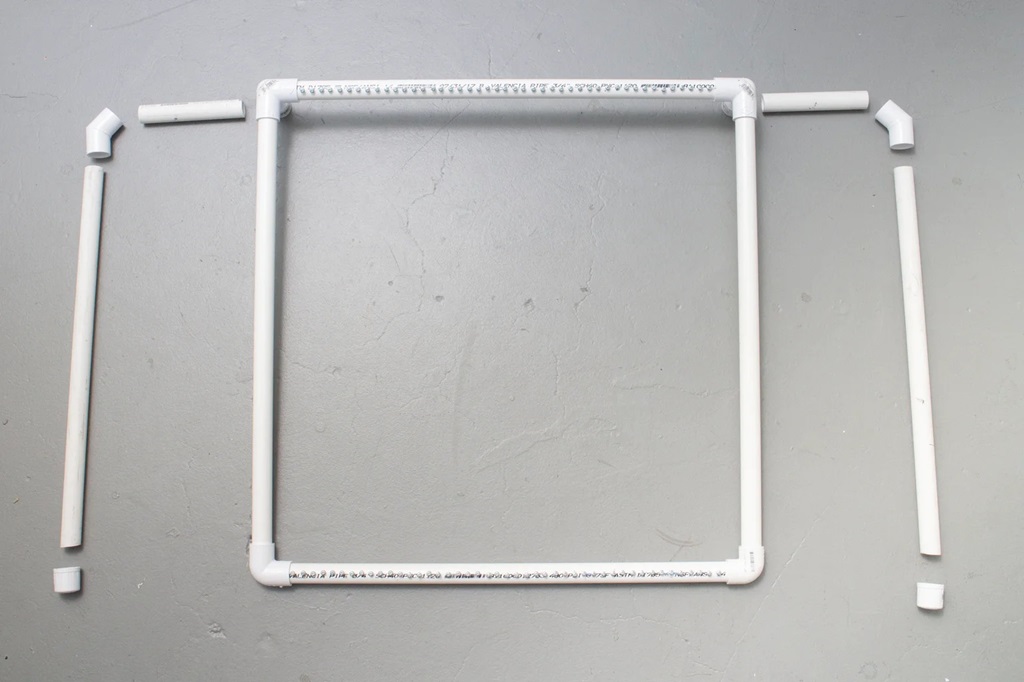
With your boards cut, it’s time for assembly. Here are the steps:
- Lay the two baseboards parallel to each other on the floor. Position the legs vertically at each end.
- Attach one crossbar to the top ends of the legs using bolts/washers.
- Attach the other crossbar parallel to the first, bolting it to the legs.
- Bolt the bottom ends of the legs to the baseboards. Check corners for 90 degree angles.
- Add support bars between the legs about halfway up, bolting them to the legs.
- Flip the frame over and attach the remaining baseboards with bolts.
Having an extra set of hands helps during assembly. Take your time securing each bolt and verifying angles. The frame should now be structurally complete and standing upright.
Step 5: Add Support Bars Against Sagging
Gravity and the weight of backdrops can cause the crossbars to sag over time. Adding vertical support bars prevents this.
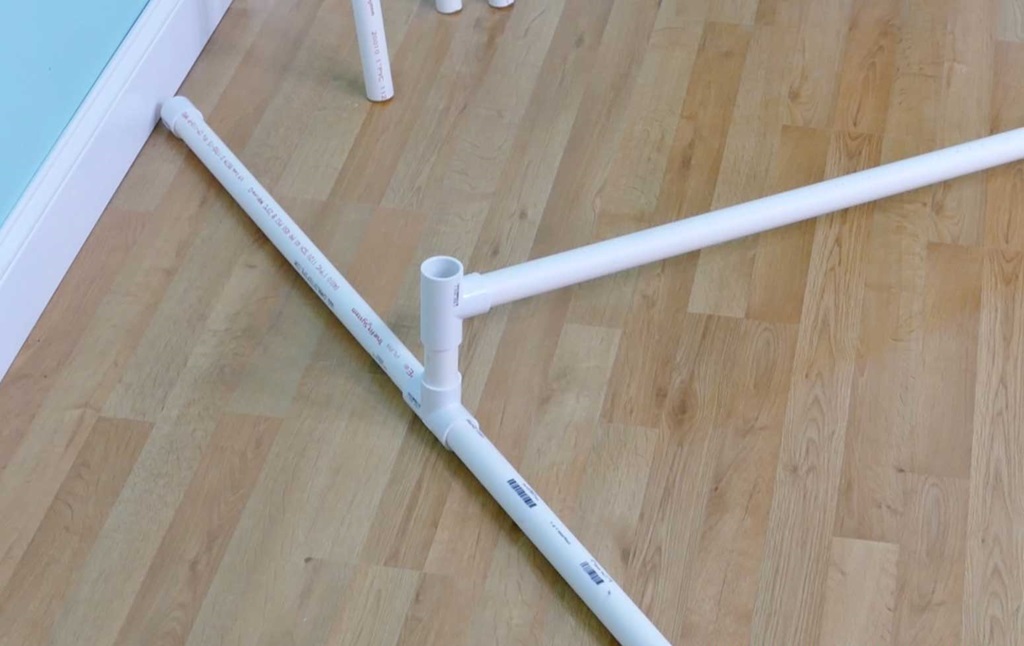
Cut two 8 foot sections of 1 1/2″ PVC pipe. Use corner elbow joints to attach the PVC vertically between the crossbars, near the outer edges. The pipes should be snug but still slide up and down easily.
These support pipes will slide up and press against the crossbars after you hang backdrops. This tensions the crossbars and prevents sagging.
Step 6: Paint or Stain the Wood for an Attractive Finish
With assembly complete, it’s time to apply a protective, attractive finish. You can:
- Paint – Use spray paint or regular brush-on paint in your color of choice. Black is common. Prime first.
- Stain – For a natural wood look. Apply gel stain with a brush and polyurethane over it.
- Wallpaper – For a fun backdrop pattern on the frame itself. Use wallpaper adhesive to attach it.
Apply two to three coats of your chosen finish, letting it dry between coats. The finish protects the wood from scrapes and scratches during use.
Step 7: Add Options for Hanging Backdrops
Next, you need to attach hardware for hanging your backdrops onto the crossbars. Here are some options:
- Curtain clips – Affix curtain clips along the crossbars to clip backdrop fabric to.
- Eye hooks – Screw eye hooks into the crossbars and hang backdrops from them using S-hooks.
- Spring clamps – Use clamps to grip the crossbars and fabric. Allows adjustable positioning.
- Double sided tape – Attach hook-side tape to the bars and loop-side to fabric.
Space your hanging method out at intervals across the crossbars to evenly distribute the backdrop’s weight. Test hang a backdrop and adjust your hardware as needed before use.
Step 8: Add Mobility Options
For convenience, you may want to make your backdrop photo stand movable by adding:
- Casters – Attach a caster wheel to each corner of the base. Allows you to roll the stand around. Lock the wheels during use.
- Folding legs – Hinge the legs in the middle to allow them to fold inward for storage. Bolt on detachable crossbars.
- Removable legs – Design the legs to slide in and out of the baseboards using pipe fittings. Makes the stand collapsible.
- Handles – Mount handles on the legs or crossbars to make the stand easier to move. Helpful with heavier stands.
Mobility allows you to move the backdrop stand between shooting locations and store it compactly when not in use.
Step 9: Add Safety Precautions
A tall, heavy backdrop stand presents some safety considerations:
- Sandbags – Place heavy sandbags on the bottom base to weigh it down and prevent tipping.
- Securing to wall – Use brackets or guy wires to secure the top of the stand to a wall stud. Prevents it falling over.
- Assistants – Have assistants help hold and stabilize the stand while attaching backdrops.
- No climbing – Never climb onto the backdrop stand. Use a ladder or lift for reaching the top crossbar.
- Level surface – Only setup on a flat, level floor. Uneven surfaces can make it prone to tipping over.
- Load testing – Start by hanging lighter backdrops and add weight gradually while monitoring for stability.
Following these precautions will help keep your backdrop stand secure during use. Safety should always come first.
Step 10: Use Your Backdrop Stand
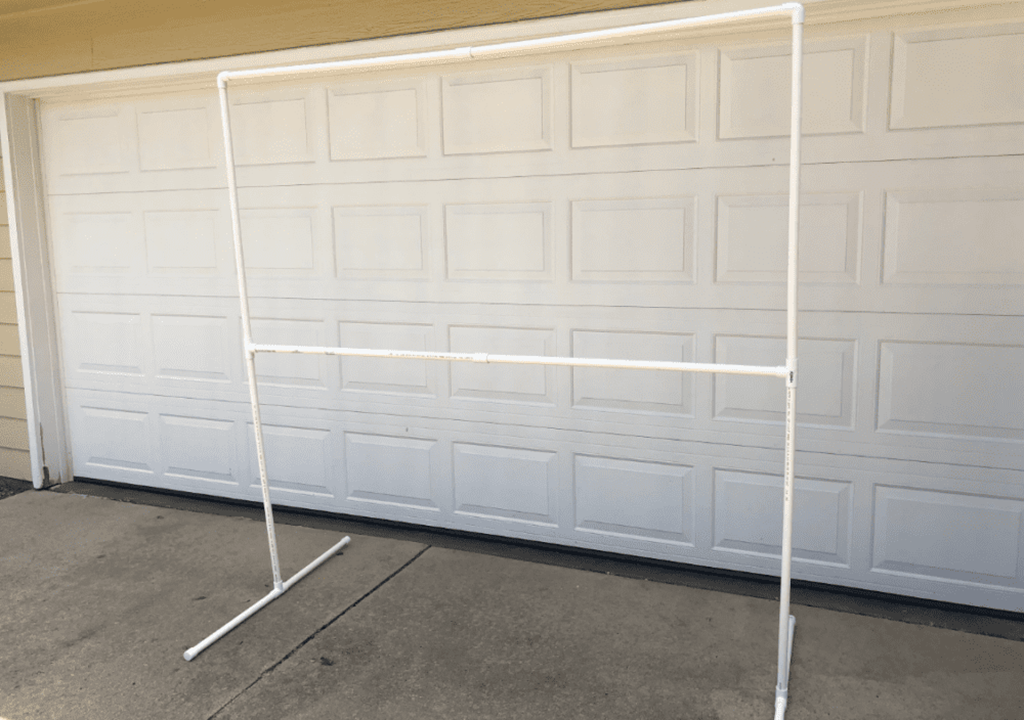
You’re now ready to start using your DIY photography backdrop stand! Here are some usage tips:
- Hang backdrops evenly from end-to-end to prevent sagging in the middle.
- Use clamps on the bottom and pins on top to keep the backdrop taut and smooth.
- Have assistants gently pull down on support pipes as you attach backdrops to create tension.
- Start with lighter fabrics like muslins and work up to heavier backdrops as you get experience.
- Use sandbags or weights on drapes that won’t lay flat to keep them in position.
- Adjust lighting to evenly illuminate backdrops and avoid bright hot spots.
- Take caution moving around the stand and prevent subjects from pulling or leaning on it.
Experiment with different backdrop fabrics and lighting to achieve perfect, consistent backgrounds for your images. Having a custom backdrop stand opens up countless creative possibilities!
Conclusion
Building your own backdrop stand takes some effort, but provides you with a customized solution at a fraction of the cost of buying retail. Following the steps outlined above will ensure you end up with a sturdy, reliable photography backdrop stand.
The ability to hang seamless backdrops makes photographing subjects much easier by allowing you to control the environment. And having the stand on wheels or made collapsible enables you to use it anywhere.
After finishing your initial backdrop stand, consider experimenting with enhancements like backdrops lights, a self-locking tensioning system, or upgraded casters. Let your creativity run wild!
FAQs
What size backdrop stand should I build?
For versatility, a 6 to 8 foot wide crossbar is recommended. The height can be 8 to 10 feet tall depending on your ceiling clearance. Build the base around 24 x 36 inches minimum for stability.
What materials work best for a backdrop stand?
3/4 inch plywood provides durability at a reasonable cost for the frame. PVC pipes are light but sturdy for crossbars and support bars. Carriage bolts allow tool-free assembly and disassembly.
How much weight can a plywood backdrop stand safely hold?
A plywood frame stand can comfortably hold 100 lbs or more. Add extra support bars and crossbeams if you need to hang heavier backdrops exceeding that.
How can I mount my backdrop stand if attaching to walls is not an option?
Free-standing backdrop stands should be weighted down with at least 50 lbs of sandbags on the bottom base. You can also reinforce the legs and add triangle braces at the bottom for stability.
What is the best way to hang fabric backdrops on my stand?
Using spring clamps at intervals along the crossbars allows you to easily attach, adjust, and swap out backdrop fabrics of varying weights and sizes.